Posted on: September 29, 2014
Two primary methods for analysis in non-contact ultrasound (NCU) are X-Y imaging and continuous inspection for moving production lines. The Ultran Group has focused on developing high performance products for both such applications, with the core purpose of supporting manufacturing quality control. Depending upon the application, either X-Y scanning or continuous inspection may be best suited. X-Y imaging can produce high resolution images (even less than 1mm x 1mm pixel size), allowing for detection of small defects and non-uniformities. Online continuous scanning can also provide very high resolution, but is often most suitable for monitoring bulk properties and larger defects.

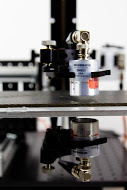
In October we will be launching a new X-Y imaging system, U710, capable of providing high resolution imaging of parts at scanning speeds of up to 1 meter per second. This system can image a 300mm x 300mm (2 ft. x 2 ft.) part at very high resolution (1mm x 1mm) in less than 3 minutes. At medium resolution, 5mm x 1mm, often suitable for most production QC environments, the U710 can complete a scan in less than 1 minute. Key takeaway: The U710 can provide high throughput and high resolution imaging for production QC at rates of up to 100 parts per hour, upon relatively large size parts. It is also fully customizable for large parts (up to 2 meters x 2 meters), and is light-weight and portable. We are gearing the U710 to finally bring high-resolution NCU imaging into production QC for applications which we have been solving for customers over the last decade: Composites, wood, ceramics, batteries, and more.

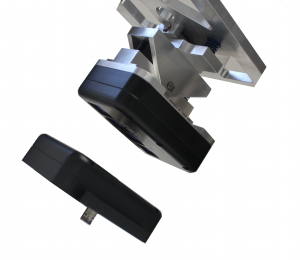
Our advancements in multi-channel continuous inspection are equally exciting. With over a dozen systems in service, we are now delivering customized transducer array configurations and software solutions for customers that produce piece-parts as well as continuous/webline material. These systems are vary from one application and customer to another as the transducer shape, size, and placement are carefully decided to provide optimal information at a reasonable cost. Recording data continuously for 100% manufacturing inspection, our multi-channel online systems provide instant feedback during production, allowing operators to react to any issues that could cause a process to move out of control. With full customization of the transducer array, the resolution can be tweaked to detect small defects or general changes throughout production. Our software provides real-time analysis; line-scan and rolling c-scan form, as well as customizable reports after a manufacturing run is completed, serving as certification to accompany a finished product/batch. NCU continuous inspection systems provide the ultimate tools for process engineers tasked with ensuring the high quality manufacturing.
We will continue to keep you updated on further progress and look forward to demonstrating these products at the CAMX show in Orlando from October 14-16 as well as the ASNT conference in Charleston, October 27-30.
– Anuj Bhardwaj
The Ultran Group